Classroom Door Sign Laser Cut File: A Guide to Creating Inspiring Decor
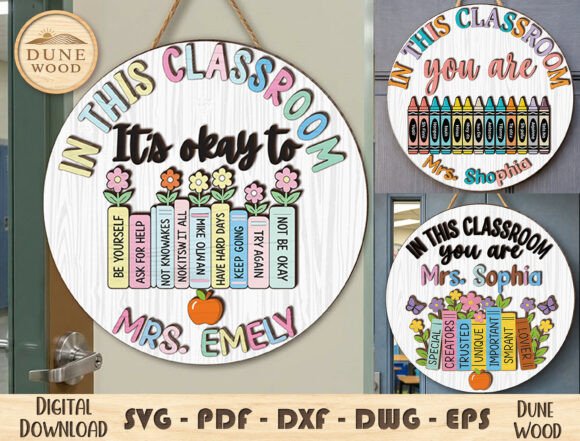
Creating a welcoming atmosphere in an educational space starts with the first thing students and parents see: the classroom door. A well-designed entrance sets the tone for learning, safety, and community. For teachers, school administrators, and craft entrepreneurs, the Classroom Door Sign Laser Cut File offers a powerful way to transform a plain door into a vibrant statement of encouragement. This digital design features a round plaque filled with positive messages like “In This Classroom You Are…” and “It’s Okay To…”, surrounded by playful elements such as crayons and flowers. However, simply downloading a file does not guarantee a professional result. Understanding how to properly evaluate, prepare, and execute this project is the difference between a cherished keepsake and a frustrating waste of materials.
Understanding the Value of Digital Vector Files
Before diving into the creation process, it is essential to understand exactly what you are purchasing. A Classroom Door Sign Laser Cut File is not a physical object; it is a set of vector-based instructions compatible with machines like Glowforge, xTool, OMTech, and various CNC routers. These files come in multiple formats—AI, DWG, EPS, DXF, PDF, and SVG—to ensure compatibility across different software platforms. The primary appeal lies in the ability to customize the design instantly. You can easily insert a teacher's name or adjust the size to fit specific door dimensions without losing image quality.
The flexibility of these vector files allows creators to experiment with various materials, from birch plywood and MDF to acrylic. This versatility makes the design ideal for teacher gifts, permanent school decorations, or DIY craft products sold at local markets. Yet, many beginners overlook the technical nuances required to translate a digital file into a flawless physical sign, leading to common pitfalls that affect both the aesthetic and structural integrity of the final product.
Common Mistakes When Choosing and Using Laser Files
One of the most frequent errors involves selecting the wrong file format for the specific machine being used. While the listing mentions six formats, not all laser cutting software accepts every type equally. For instance, using a raster image instead of a clean vector path can result in jagged edges or failed cuts. Always verify that your chosen software supports the specific format you intend to use, typically SVG or DXF for most desktop laser cutters. Ignoring this step often leads to hours of troubleshooting when the machine fails to recognize the cut lines.
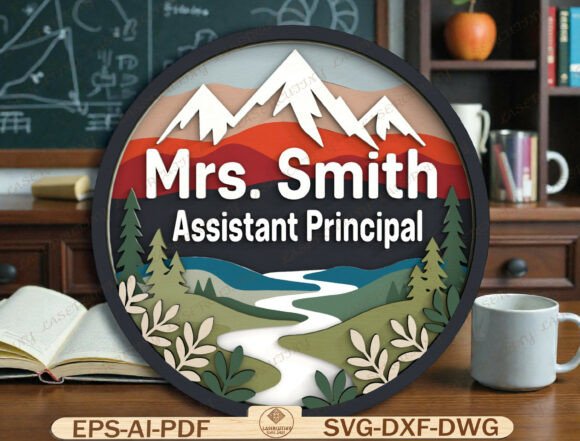
Another critical misunderstanding concerns material selection relative to the design complexity. The round plaque design includes intricate details like small text and delicate flower petals. Attempting to cut these fine details on thick, dense hardwoods can cause burning, charring, or incomplete cuts. Conversely, using material that is too thin may result in warping during the engraving process. It is vital to match the file's complexity with the appropriate material thickness and type to ensure the "positive words" remain legible and the decorative elements stand out clearly.
Furthermore, many users neglect to test their settings before committing to a full-size sign. Laser power and speed settings vary significantly depending on the brand of the machine and the specific batch of wood or acrylic. Skipping a test square on scrap material often results in wasted resources and a ruined sign. A quick test run reveals whether the engraving depth is sufficient to make the text pop or if the cut line needs more power to slice through cleanly.
Optimizing Your Workflow for Better Results
To avoid these common issues, adopt a systematic approach to your project. First, inspect the downloaded files immediately after purchase. Open them in your preferred vector software to ensure the layers are organized correctly. Look for closed paths, which are essential for successful cutting. If the lines are open or fragmented, the machine will not be able to cut the shape accurately. Clean up any stray nodes or overlapping lines before sending the job to the laser.
When customizing the teacher's name or other text, pay close attention to font choice and size. While the original design uses playful typography, overly thin fonts can disappear when engraved on textured wood surfaces. Opt for bold, sans-serif fonts that maintain readability even when the grain of the wood interferes slightly with the laser beam. Additionally, ensure there is adequate spacing between the text and the edge of the round plaque to prevent accidental breakage during handling or mounting.
Material preparation is another area where attention to detail pays off. If working with wood, sand the surface lightly before engraving to remove imperfections that could scatter the laser beam. For projects requiring a polished look, consider sealing the wood after cutting but before applying any adhesive backing. This prevents moisture absorption, which can warp the sign over time, especially in busy school hallways with fluctuating humidity levels.
What to Check Before You Begin
- File Integrity: Confirm that all vector paths are closed and that the design scales correctly without distortion.
- Machine Compatibility: Ensure your laser cutter or CNC router can handle the file format and the specific material thickness you plan to use.
- Material Suitability: Choose a material that complements the design's intricacy; avoid very dense woods for detailed engravings unless you have high-power equipment.
- Test Settings: Always run a test on a scrap piece of the same material to dial in the perfect power and speed settings.
- Customization Limits: Verify that any added text remains legible at the intended size and does not compromise the structural balance of the round sign.
By taking these precautions, you transform a simple digital download into a high-quality, inspiring decoration. The Classroom Door Sign Laser Cut File serves as a foundation, but your attention to detail determines the final outcome. Whether you are a teacher looking to brighten your classroom, a parent creating a heartfelt gift, or an entrepreneur launching a new product line, focusing on these practical steps ensures efficiency, cost-effectiveness, and a beautiful result. Remember, the goal is to create a space where students feel valued and encouraged, and a professionally crafted sign is a tangible representation of that commitment.